DEMIGUN (2020-)
SCRAPTOWN (2019)
Scraptown was my capstone project that I worked on as a part of my final year of the RMIT Games course. I was the team’s sole programmer and responsible for building the game’s various systems from the ground up.
Branching / Conditional Dialogue + Node-Based Navigation
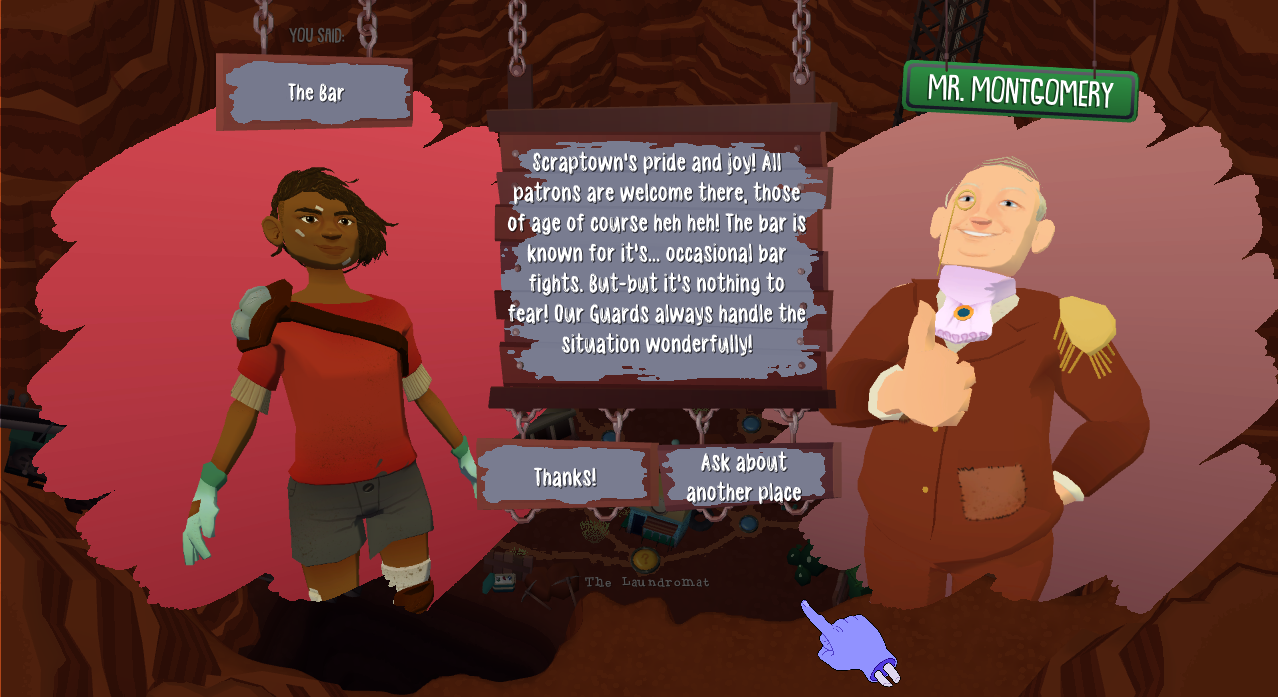
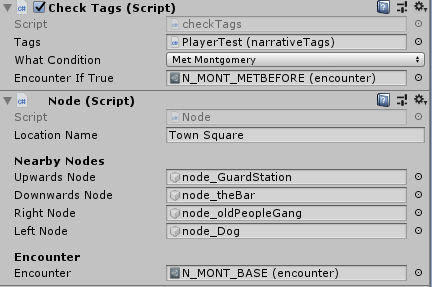
For Scraptown I created a system that allows for dialogue to change depending on the responses the player(s) choose.
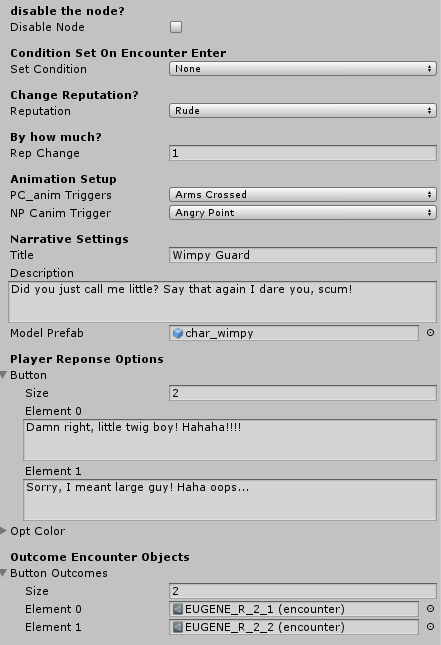
‘Encounters’ are scriptable objects that store information such as the dialogue, character model to display and conditions that may be set upon triggering this encounter such as “met moustache kid before“.
A big part of my process when making this system was to ensure that it was easy to use for the rest of my team. This meant that all the game’s dialogue and narrative was implemented purely through Unity’s inspector. I wanted to avoid any scenarios that would require other members of my team to open and edit scripts.
Code Sample
The game’s dialogue system runs off a switch statement to keep each stage of the process isolated.
This is the section that runs once an option is chosen.
            case 3: //enact choice
                if (encounterInfo.buttonOutcomes.Length > 0) //if there's no subsequence encounters, skip
                {
                    baseE = false; //this is no longer the first panel of the conversation
                    if (selectedOpt == "opt1")
                    {
                        //  because there could be 2 elements in the array, check each if null
                        //  this way some choices can lead to more dialogue while others can end the encounter
                        if (encounterInfo.buttonOutcomes[0] != null)
                        {
                            prev_opt.text = encounterInfo.button[0]; //display this as the previously chosen option
                            encounterInfo = encounterInfo.buttonOutcomes[0]; //set current encounter to this encounter
                            DialogueState = 1; //update UI
                        }
                        else
                        {
                            DialogueState = 4; //end conversation
                        }
                    }
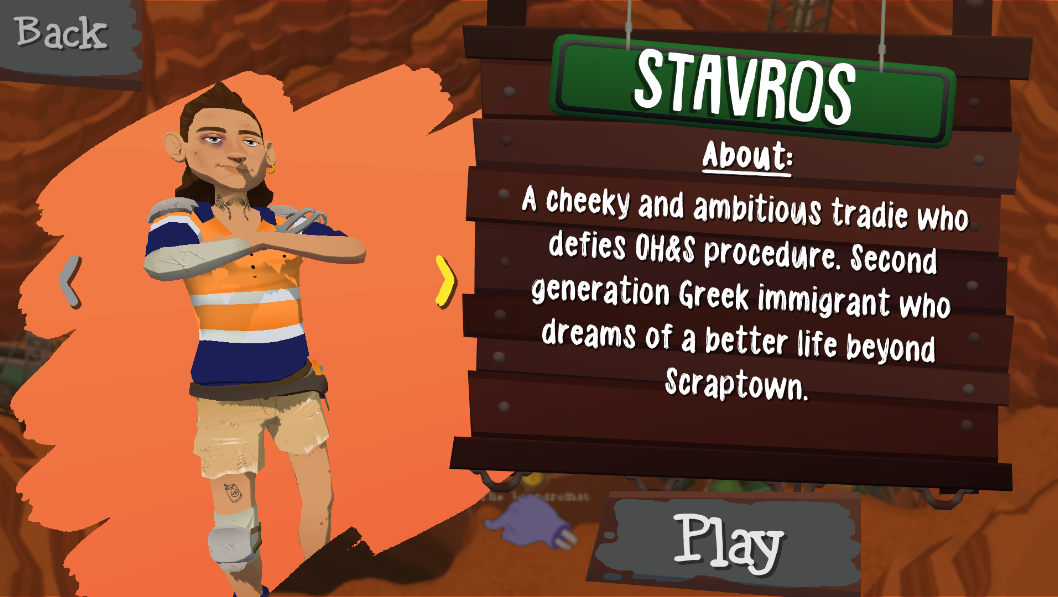
Character Select Screen
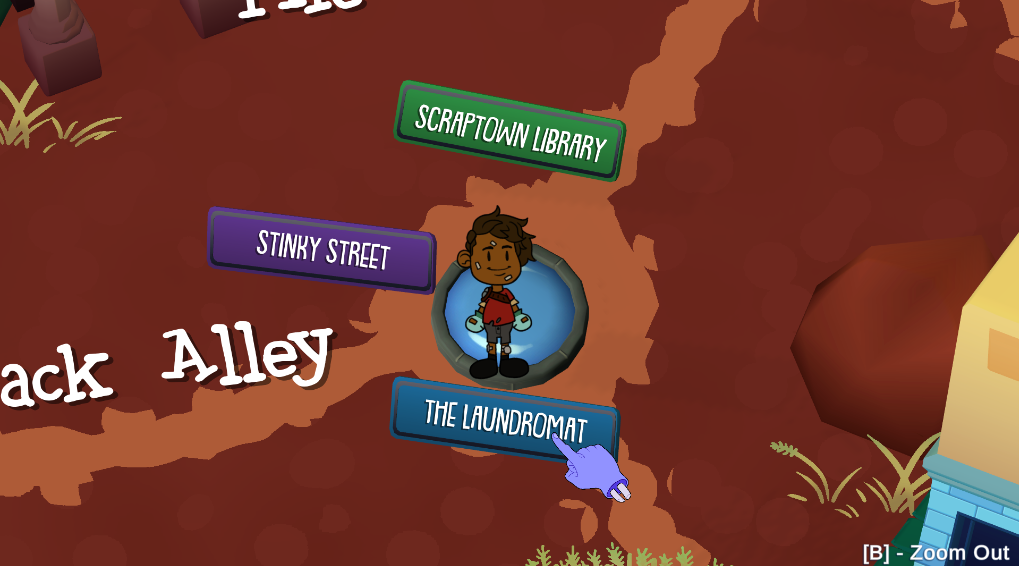
A quick character selection screen that lets you choose your character before entering the game.
Your selection controls what model and sprite will display during dialogue and overworld navigation.
axe throw VR (2019)
A personal project I worked on to experiment with VR development.
The aim of Axe Throw VR was to recreate the Leviathan Axe’s throw and retrieval mechanic from Santa Monica Studio’s ‘God of War’ (2018).
Code Sample
This is the code for apply force to objects that you throw. There’s also some checks for if you’re holding a ‘weapon’ or not.
If you are, then I added some juice to the throw by adding some extra force and disabling gravity temporarily.
if (throwing) //this triggers once you let go of an object
{
  if (rb != null) //make sure there's actually a rigidbody
  {
    if (rb.tag == "Pickup") //for items that aren't weapons e.g. a small cube
    {
      rb.velocity = vel.GetVelocityEstimate(); //apply the vive controller's velocity to the object
      rb.angularVelocity = vel.GetAngularVelocityEstimate();
      rb.maxAngularVelocity = rb.angularVelocity.magnitude;
    }
    else if (rb.tag == "Weapon") //if this object is defined as a weapon
    {
      currentWeapon = rb.gameObject;
      if (vel.GetVelocityEstimate().magnitude > velToWeaponThrow) //if the controller is moving fast enough, this is a throw
      {
        Vector3 angVel = vel.GetAngularVelocityEstimate(); //get velocity of vive controller
        rb.useGravity = false; //turn off gravity temporarily to make it go further
        rb.velocity = vel.GetVelocityEstimate() * 1.4f; //apply velocity of controller to the object
        rb.angularVelocity = angVel; //apply angular velocity of controller
        rb.AddTorque(rb.transform.TransformDirection(Vector3.right) * 1000, ForceMode.Impulse); //add extra force to throw to make you feel STRONG
        rb.maxAngularVelocity = rb.angularVelocity.magnitude; //set the max angular vel
      }
      else //dont add extra force/juice if you aren't actually 'throwing it'
      {
        rb.velocity = vel.GetVelocityEstimate();
        rb.angularVelocity = vel.GetAngularVelocityEstimate();
        rb.maxAngularVelocity = rb.angularVelocity.magnitude;
      }
    }
  }
  throwing = false;
}
the pit (2019)
Created as a part of my third year in the RMIT Games course.
This was one of 3 ‘Sprints’ where we were given 4 weeks to make a game.
Segmented Level Generation:
The Pit’s level generation system works off a sequence of room prefabs being loaded.
Each room has a beginning and ending ‘node’ that signifies the joining point for each room so that we can have rooms make any change in elevation and still allow them to line up.
Code Sample
void GenerateRooms()
    {
        for (int i = 0; i < howManyRooms; i++)
        {
            int randRoom = Random.Range(0, allRooms.Length);
            GameObject roomToCreate = Instantiate(allRooms[randRoom], spawnPosition, Quaternion.identity);
            Room roominfo = roomToCreate.GetComponent<Room>();
            spawnPosition = roominfo.EndNode.transform.position; //get where to spawn the next room from the end node of this room
            if (roominfo.type == Room.Type.connector)
            {
                //if the room chosen is a connector room, make sure that it is followed by a main room. this ensures that you won't get just a huge string of connector rooms.
                int randMainRoom = Random.Range(0, mainRooms.Length);
                GameObject MainRoomAfterConnector = Instantiate(mainRooms[randMainRoom], spawnPosition, Quaternion.identity);
                Room mainRoomInfo = MainRoomAfterConnector.GetComponent<Room>();
                spawnPosition = mainRoomInfo.EndNode.transform.position;
            }
        }
        //once all rooms are created, slap a saferoom on the end as a reward
        GameObject SafeRoom = Instantiate(safeRooms[Random.Range(0, safeRooms.Length)], spawnPosition, Quaternion.identity);
        Room SafeRoomInfo = SafeRoom.GetComponent<Room>();
        spawnPosition = SafeRoomInfo.EndNode.transform.position;
        NavSurface.BuildNavMesh(); //build navmesh at runtime
    }
Line of Sight AI:
Enemies have an internal visibility meter that builds as you are both within their range and line of sight.
Once this reaches a point they will pursuit you. If you break line of sight, they will move to your last known location.
Code Sample
void OnTriggerStay(Collider colInfo) //trigger defines FOV of AI
    {
        if (colInfo.gameObject == PlayerObj)
        {
            var heading = PlayerObj.transform.position - thisPos;
            var distToPlayer = heading.magnitude;
            var dirToPlayer = heading / distToPlayer; //get direction of player from here

            RaycastHit hitInfo;
            if (Physics.Raycast(thisPos, dirToPlayer, out hitInfo))
            {
                var hitHeading = hitInfo.point - thisPos;
                var hitDist = hitHeading.magnitude;
                var hitDir = hitHeading / hitDist; //get direction of hit for debug ray
                if (hitInfo.collider.gameObject == PlayerObj.gameObject) //are we hitting the player?
                {
                    inLOS = true;
                    lastKnownLoc = hitInfo.point; //last place player was seen
                } else {
                    inLOS = false;
                }
                //draw the ray so we can see how its working
                Debug.DrawRay(thisPos, hitDir * Vector3.Distance(thisPos, hitInfo.point), Color.yellow);
            }
            if (playerFound == true) //this activates from a value that increases if 'inLOS' is true
            {
                navAgent.SetDestination(lastKnownLoc);
            }
        }
    }